Supercharge Your Website Marketing with Remarketing
Remarketing is a powerful tool that allows you to display advertisements online exclusively to people who have previously visited your website. This article will show you step-by-step how to add Remarketing for AdWords to your WordPress website. The entire process can be completed in under five minutes. By adding Remarketing to your website marketing arsenal, you’ll be able to show relevant ads to people who visited certain pages of your website. This allows you to display a highly targeted advertisement to specific segments of your audience, and deliver them to a landing page and/or special offer that is relevant to their interest. Even if you’re not ready to begin your advertising campaign just yet, our recommendation is to add the AdWords Remarketing tag to your WordPress website as early as possible to begin building your Remarketing Lists.
1. Create or Login to Your AdWords Account
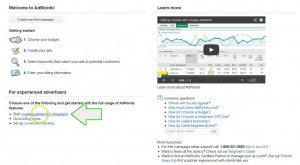
If you don’t have an account with AdWords, create one now. After following the initial Account Creation steps, you will see the screen below. Instead of following the steps to create your first campaign, skip down to the section titled “For Experienced Advertisers” and click “Start creating advanced campaigns. (click on each image in this tutorial to enlarge)
2. Click Shared Library
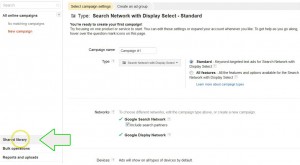
In the left column toward the bottom, click “Shared Library”
3. Shared Library > Audiences
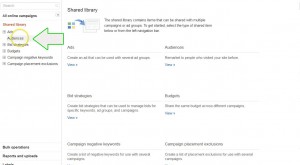
In the left column, under “Ads” click on “Audiences”.
4. Click Set Up Remarketing
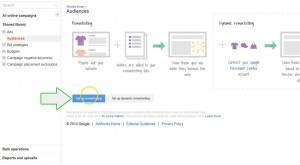
In the Audiences tab, you’ll see a small graphic explaining how remarketing works: People visit your website; Visitors are added to your remarketing lists; Show them your ads while they browse the web. Click the button titled “Set up remarketing”.
5. Acquiring The Remarketing Tag Code Snippet
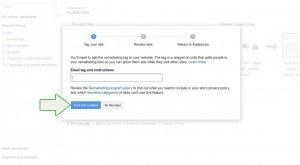
After you click “Set up remarketing” in step 4 above, a dialog box will appear which allows you to “Email the tag and instructions” to add the remarketing tag to your website. Enter your own email address into the text field and click “Send and continue”. You don’t need to go open this email, we’ll copy the Code Snippet in Step 11.
6. The All Visitors List
The second step of this dialog box is titled “Review lists”, and it explains that AdWords has already created a starter list titled “All visitors”. This list will start to build as soon as you add the Remarketing tag Code Snippet to your website and is a huge lifesaver for anyone who forgets to create a list. (no list = no one to view your Remarketing ads)
Click the button titled “Continue”.
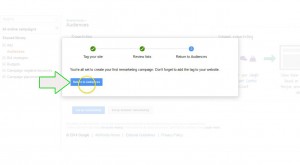
7. Click Return to Audiences
Close the dialog box by clicking the button “Return to Audiences”
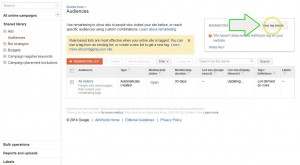
8. View Tag Details
You are now viewing the “Audiences Homepage” where you will create and view your Remarketing lists. In the upper right corner, click “View tag details”.
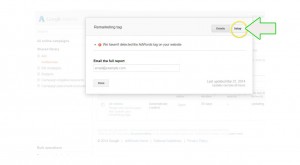
9. Click Setup
In the “Remarketing tag” dialog box that appears, click “Setup” in the upper right corner.
10. View The Remarketing Tag Code Snippet
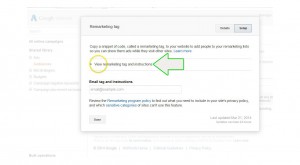
In the center of the dialog box, click on the words “View remarketing tag and instructions”
11. Copy Your Remarketing Tag Code Snippet
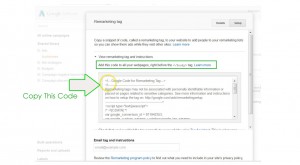
Using your mouse or keyboard shortcuts, COPY the entire code snippet.
12. Adding The Code Through WordPress Editor
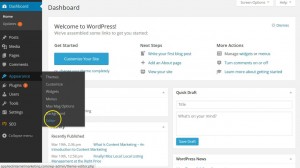
Login to your WordPress Dashboard. Hover over “Appearance” and click “Editor” from the list of options.
13. Find Footer.php
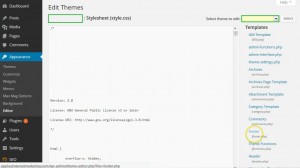
The list on the far right contains all of the primary files of your WordPress theme. To be certain, check that your Theme Name is visible at the top and in the dropdown shown in the green rectangle in the image below. Find and click the file named “Footer.php”
14. Paste Remarketing Code Snippet
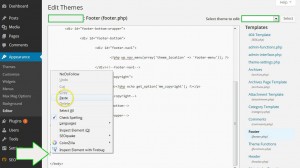
Scroll to the bottom of footer.php and place your cursor above the line that contains the closing body HTML tag as shown in the image below. PASTE the Remarketing code snippet here. If your paste function does not work, leave the WordPress Editor open and COPY the code snippet again. If you left your AdWords open in another tab, great! If not simply open a new browser tab and follow Steps 1-3, and 8-11 and copy the code again.
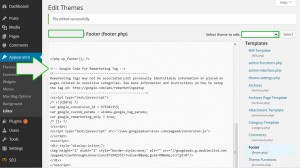
15. Ensure All Code Has Been Added
After pasting the code snippet, verify that the final two lines of your pasted code are /div and /noscript.
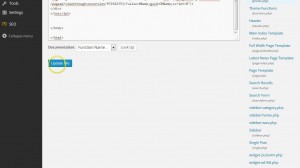
16. Don’t Forget To Update Your File!
After verifying your code was pasted successfully, click the button underneath the editing window and click “Update File”.
17. Perform A Quick Spot Check
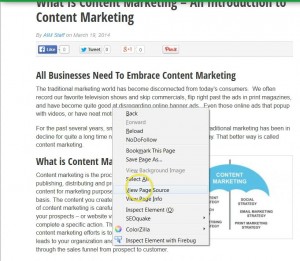
Now that we have added the Remarketing tag to the Footer, it should be on every page of your WordPress website. What I like to do is perform a quick spot check and make sure I can see it on my homepage and a blog post page. You can do the same by opening a new browser tab and navigating to your site’s homepage or a blog post and then follow these steps to view the HTML source code of the page:
Google Chrome
- Click the menu icon
on the browser toolbar.
- Select Tools, then View Source.
– or –
- Press Ctrl+U (Windows) or ⌘-Option-U (Mac).
Microsoft Internet Explorer, Mozilla Firefox or Apple Safari
Review and follow the instructions provided by each browser:
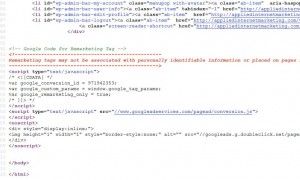
After following the steps above, a new window will open displaying the source code. Scroll all the way to the bottom, and you should see the Remarketing Code Snippet. Done!
Thank You Please Comment Below
If you’ve made it this far, please take a moment to share this post – we would greatly appreciate it. Please comment below if you have any questions or to let us know if we’ve missed anything. To get started with building your first Remarketing campaign, visit this article on Search Engine Journal: Ultimate Guide to Remarketing Lists For Search Ads

1 Comment
this is brilliant thank you so much,
I almost gave up on this. Your instructions were awesome. Thank you again
Maria