Share-Worthy Images In Under Five Minutes
 Our eyes are naturally drawn to images, and research has proven that incorporating images into your social media and blog posts will increase engagement substantially. If you don’t already use Adobe Photoshop or have a graphic designer on staff, you’ve probably wished there was an easy way to create those captivating images with catchy phrases on top of them. Fortunately, there is!
You can use a free online image editor to help you get more Likes, Shares & Comments for your blog and social media posts. This post will show you how to create an image like the one you see to your right using the free online image editor called “PicMonkey”.
Photos on Facebook Pages received 53% more Likes and 104% more Comments than the average post. HubSpot
Step One: Select “Design” > “Custom”
Go to the PicMonkey website and hover over “Design” then click “Custom”. Specify the size of the image you would like to create.
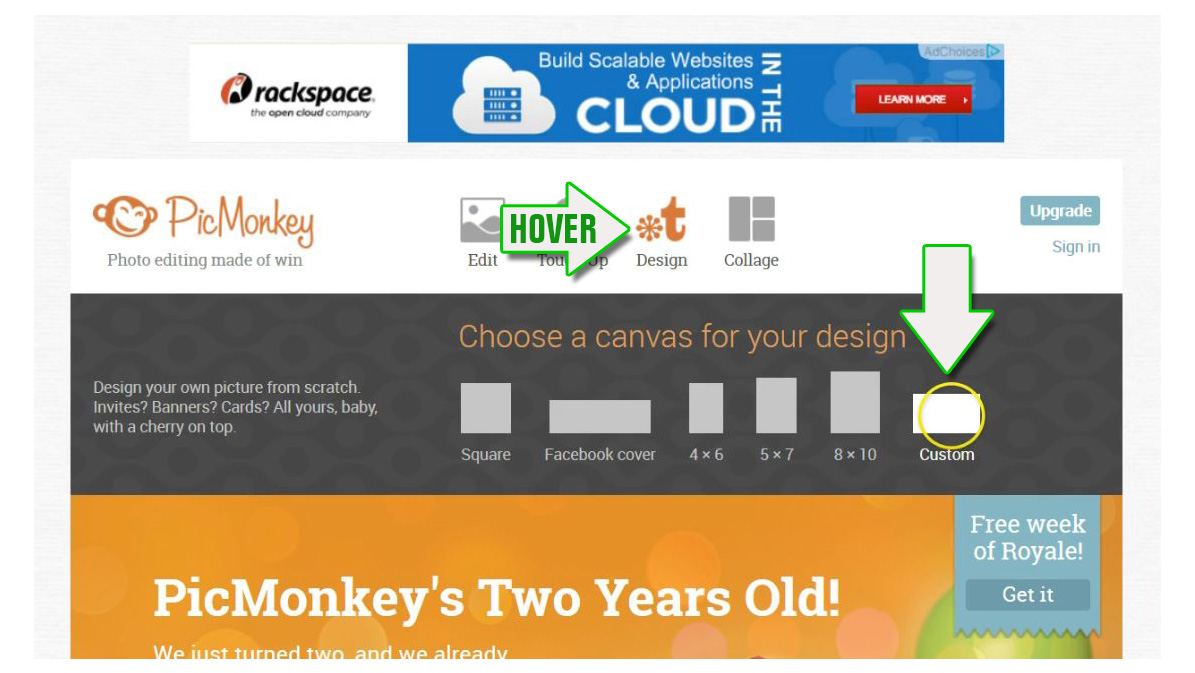
Hover over “Design” and choose “Custom”, then specify the dimensions of your new image.
Step Two: Set a Background Color
If you prefer not to use white, you can add a background color. Please Note: if you are going to be importing additional images into this creation, they must be transparent .PNG files or you will see the white background around the images you import. If you’re not sure what that means and you are going to import additional images, leave the background white. You can always change it later.
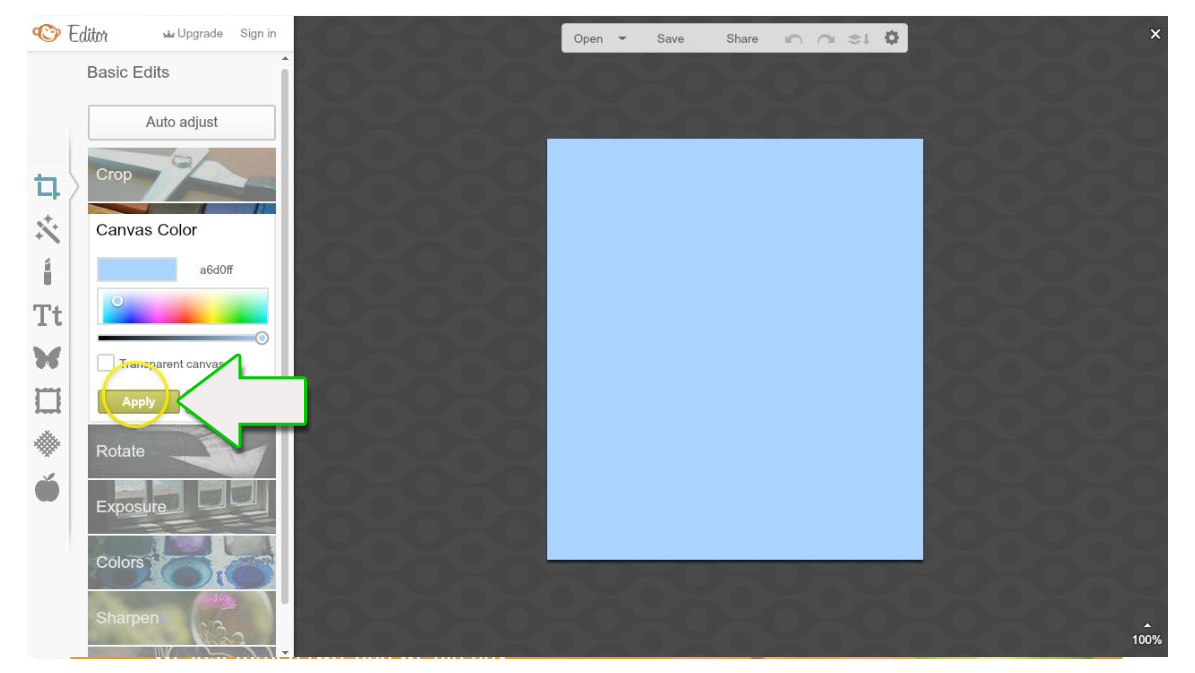
Choose A Background Color For Your Canvas
Step Three: Add a Frame
PicMonkey has several cool frames to choose from. Choose a couple and see which one you like. For this image, I’ve selected the “Museum Matte” frame. If you add a frame and notice the image has suddenly become larger, don’t worry we’ll fix that on the next step.
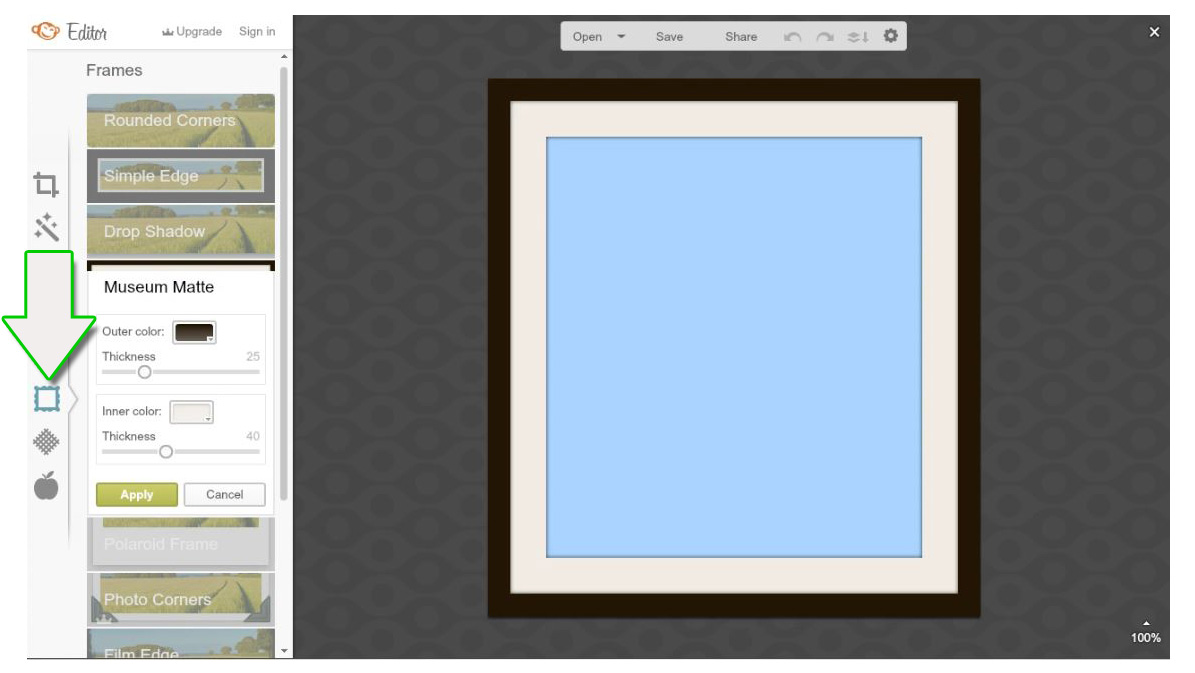
Choose From A Large Assortment Of Frames
Step Four: Verify Image Size
The Museum Matte frame increased the size of the canvas, so let’s reset the dimensions back to where we originally wanted them.

Confirm Image Dimensions After Adding Your Frame.
Step Five: Add Effects
PicMonkey has more than 45 effects that can be instantly applied to your creation. For this image we chose “Spotlight” and we moved the “Fade” slider over to 60%.

Effects Make Your Creation Look Even More Professional
Step Six: Upload An Overlay
PicMonkey offers several categories of images you can use for overlays. These will appear “on top” of what we have created thus far. You can use this feature to create a “meme” or upload your company logo to your creation. For this post we uploaded a monkey in .PNG format, as well as a “thumbs-up” image.
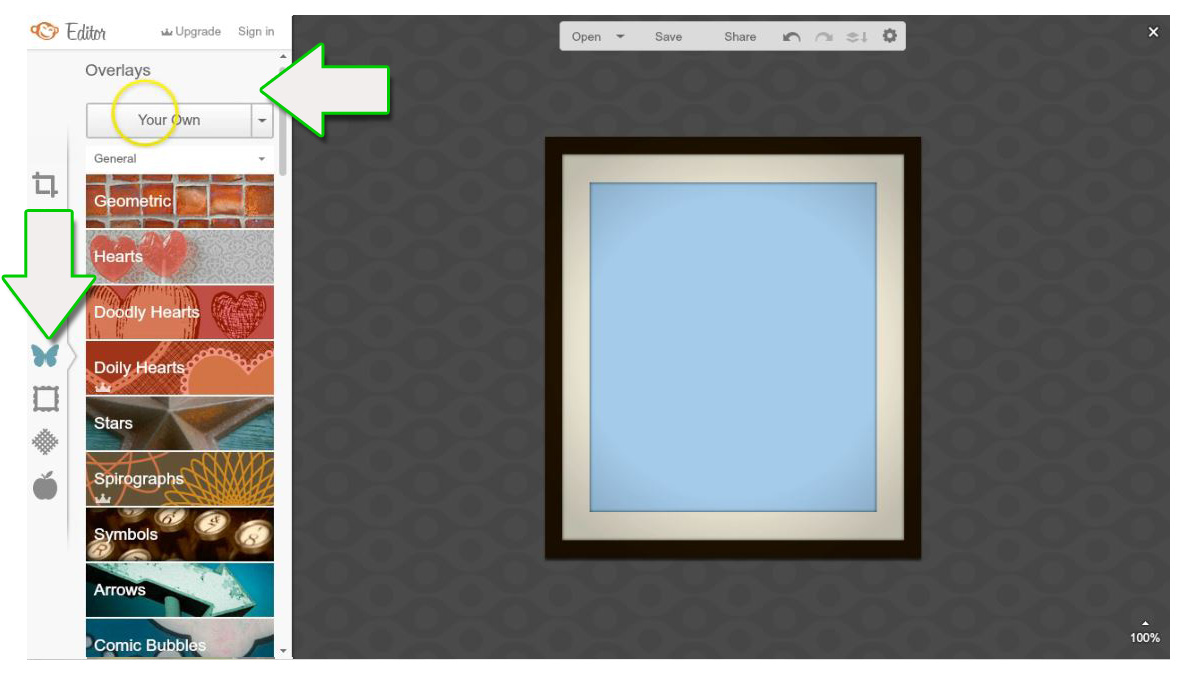
You Can Import Images Directly From Your Computer & Scale Them or Reposition on X, Y, and even Z Axis
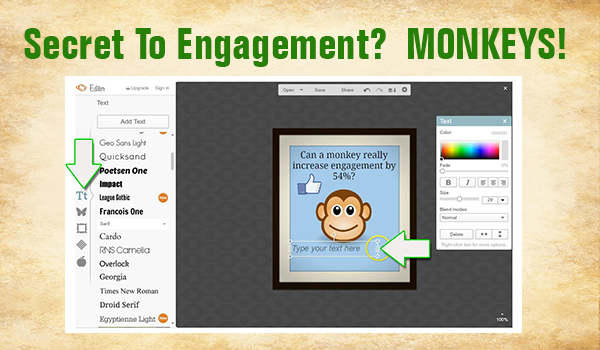
Step Seven: Add Text
Multiple text layers can be added, and PicMonkey provides an abundance of fonts to choose from. If you’re going to center your text, you will need to move the text box into alignment with the left side of your image and then drag the right border of the text box to align with the right side.
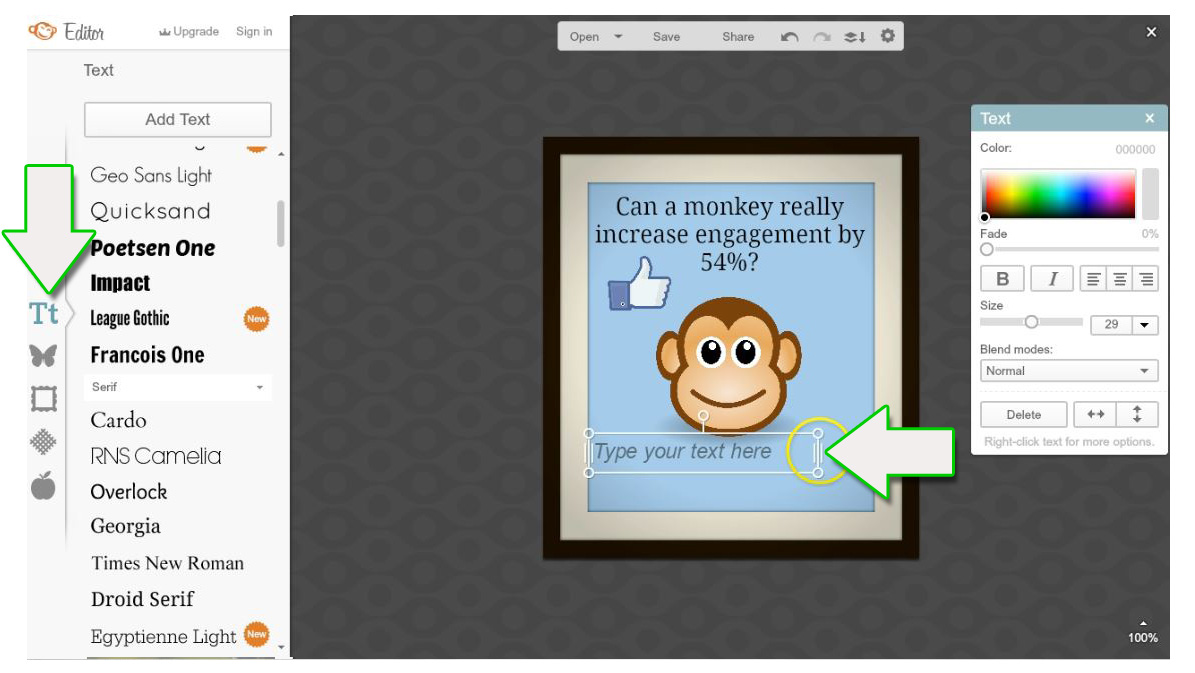
Add Text, Choose From More Than 50 Free Fonts
Step Eight: Last Minute Tweaks
At this point we’ve added a background color, Museum Matte frame, Spotlight effect, Overlays, and text. I recommend that you try some alternate background colors, font styles and sizes, themes, and effects. Make sure you like what you have created! When you’re finished with all of the last minute tweaks, click Save at the top of the image editor.
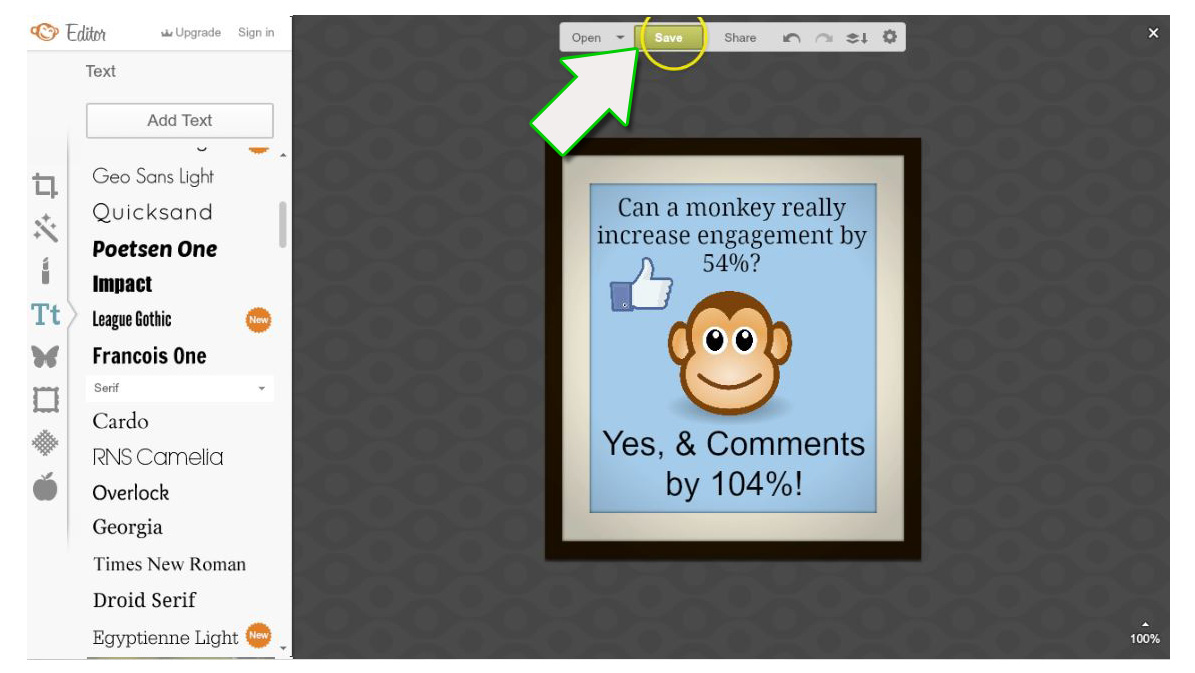
Review And Proofread Your Creation, And Make Sure You Love It!
Final Step: Save & Download
The PicMonkey save function is very intuitive and provides exactly what we need. You can choose either .jpg or .png File format (.png most notably allows you to keep a transparent background), image Quality, and one last chance to be sure your image was created with the proper Dimensions. Choose the highest Quality but if you’re going to use this in your blog, try to keep the file size under 300kb.
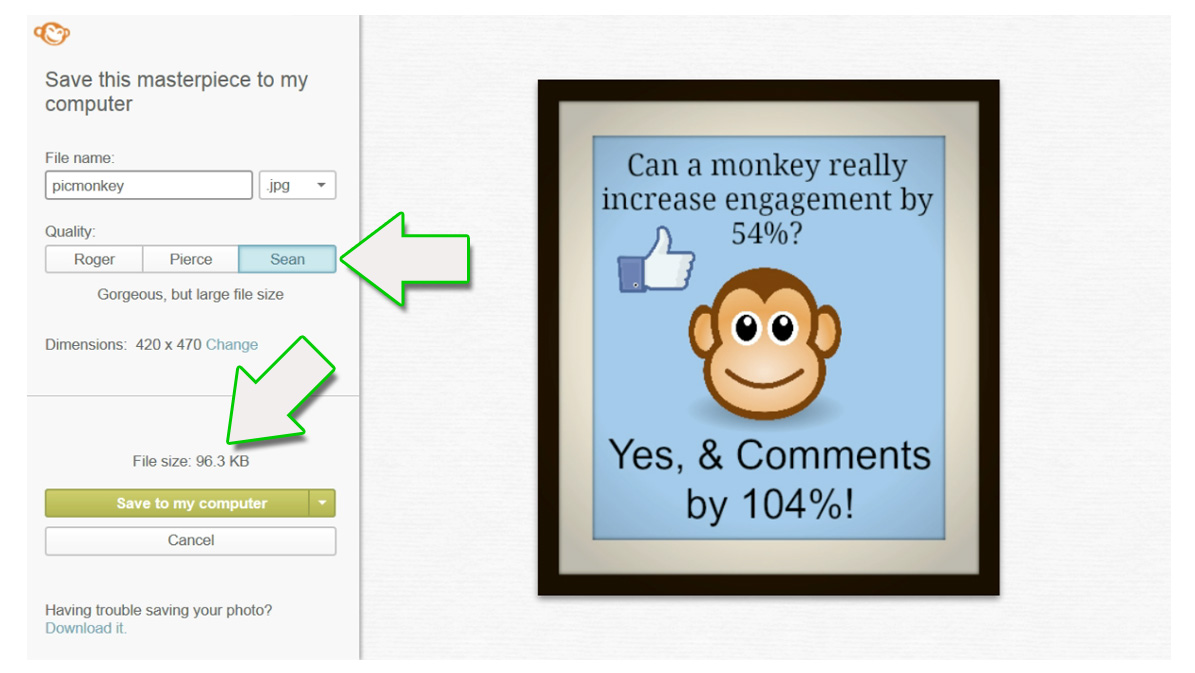
Choose A File Type, Quality, and Save!